When you hear the word parkour, what comes to mind?
The Office? Casino Royale? Ninja Warrior? Minecraft?
Do you imagine a pack of defiant teens jumping and flipping rooftops? Or a solo athlete/artist dashing through the streets below? Do you ever wonder how they avoid blown joints and cracked skulls?
Maybe you don’t, but a lot of people DO imagine that parkour comes with serious risks like injury, vandalism, trespassing, etc.
And, that’s a bummer.
The association of parkour with dangerous or reckless behavior undermines how useful it is. While danger is absolute, remember that risk is relative to the individual.
Yes, world-class parkour stunts at heights is a sensational sight but most parkour training is grounded and accessible to anyone who wants to try.
Parkour as life skills
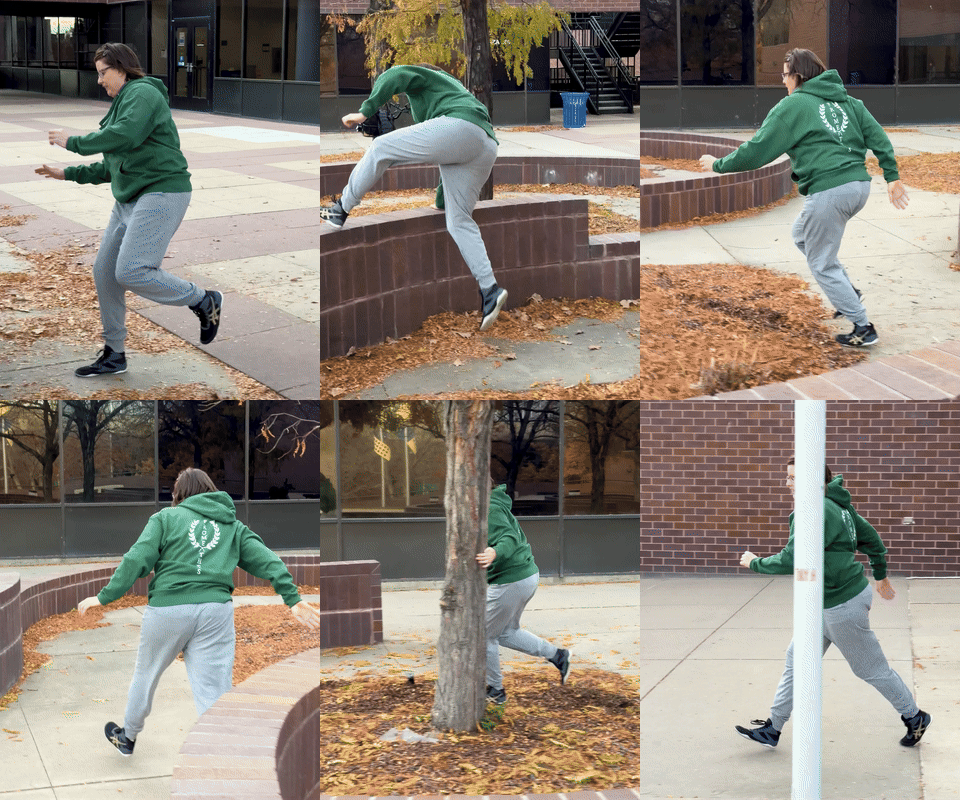
Parkour is a life skill that helps you navigate through your physical environment with greater ability. The more easily you can overcome a barrier, drop from height, or confidently balance along a narrow ledge, the better your readiness to face the world.
And it’s not just for kids and teenagers. People old and young alike can benefit from parkour. Mastering how you interact with your daily environment is not an extreme sport. It’s common sense.
When you hear a reference to parkour, think of it as a training method that prepares you to overcome physical and mental obstacles. As a distinct discipline, it entails quadrupedal movement, landing, rolling, balancing, jumping, vaulting, wall running, brachiating, climbing, and more. While advanced practitioners work to refine their power and precision, newcomers focus on simpler things, like how to strengthen their bodies and fall safely.
The purpose of this blog isn’t to provide a tutorial on the entire spectrum of parkour movements. Instead, we’ll just give you a taste of a few fundamental skills and let you take it from there.
Remember that this is a simplified breakdown. Everyone comes to parkour with a unique athletic background. Some of you may be new to bodyweight fitness. Others may come from years of gymnastics or martial arts. If you’re of the latter group, the skills below might seem easier than getting up off the ground or out of bed.
Thought experiment
In a time-sensitive situation, what are the 2 most important parkour life skills? For example, what if you need to:
- Escape a fire from the 2nd story of a building
- Scramble to higher ground due to flood or tsunami
- Evade an aggressive predator or zombie horde
Through its many practical applications, parkour is an extension of martial arts. When facing a fight or flight situation, you can either stand your ground or GTFO and ESCAPE to safety.
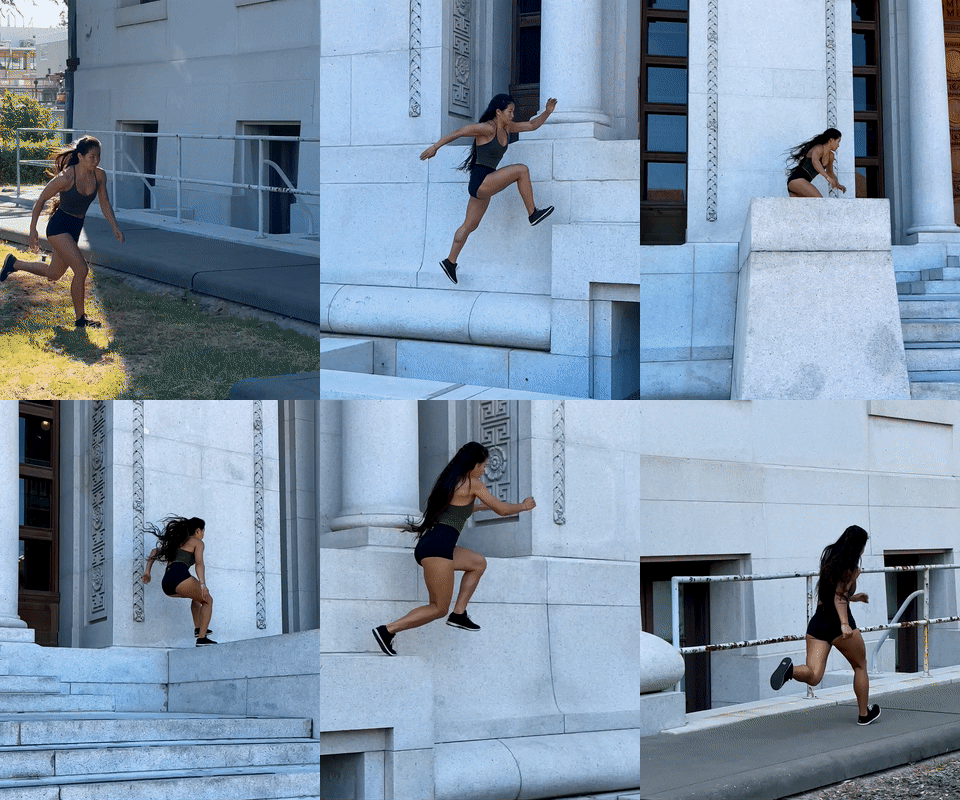
Creating vertical separation between yourself and danger is usually a good idea. Being able to ASCEND and DESCEND vertical structures is a valuable life skill to have.
Another main application of parkour is the ability to REACH. Can you scale a building to save someone from danger? Can you drop or down-climb to help someone who’s stuck? To reach others in peril, parkour skills make it happen quicker and safer.
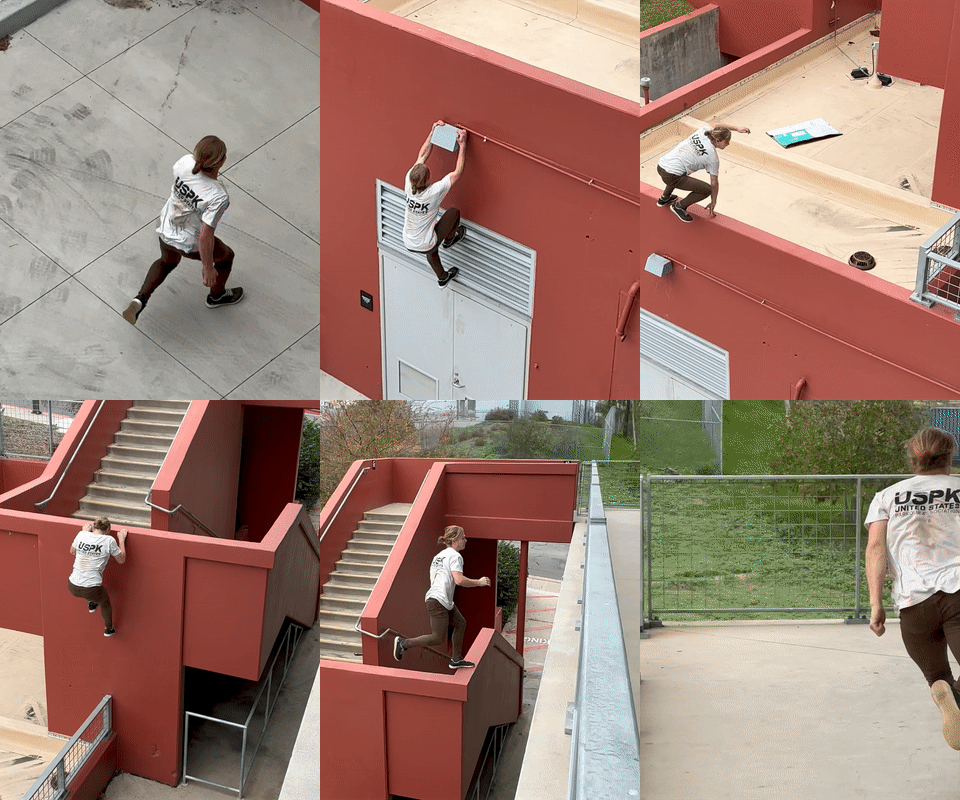
There are many more common and mundane parkour applications too. Think about being locked out and climbing into an open window. Or going up and over a high wall to catch the next bus or train.
If there’s 1 thing to gain from this post, it should get you thinking about how parkour can help you get up or down an obstacle confidently and without injury.
Sounds simple, right?
Good. Let’s dive into the fun stuff.
Getting down safely ↓
First, let’s explore what’s needed for you to descend/land on the ground safely.
There are a couple of prereqs. First, you need the flexibility to sit comfortably in a full squat. Without adequate range of motion in your spine, hips, knees, and ankles, you’ll have a hard time absorbing impact. Going into detail about how to achieve an ass-to-grass squat is beyond the scope of this post, but there are plenty of good resources available online.
Next, you need the strength to control your bodyweight through an air squat. This should be easy for most people, but before going on, make sure you can do at least 10 perfect air squats in a row without difficulty.
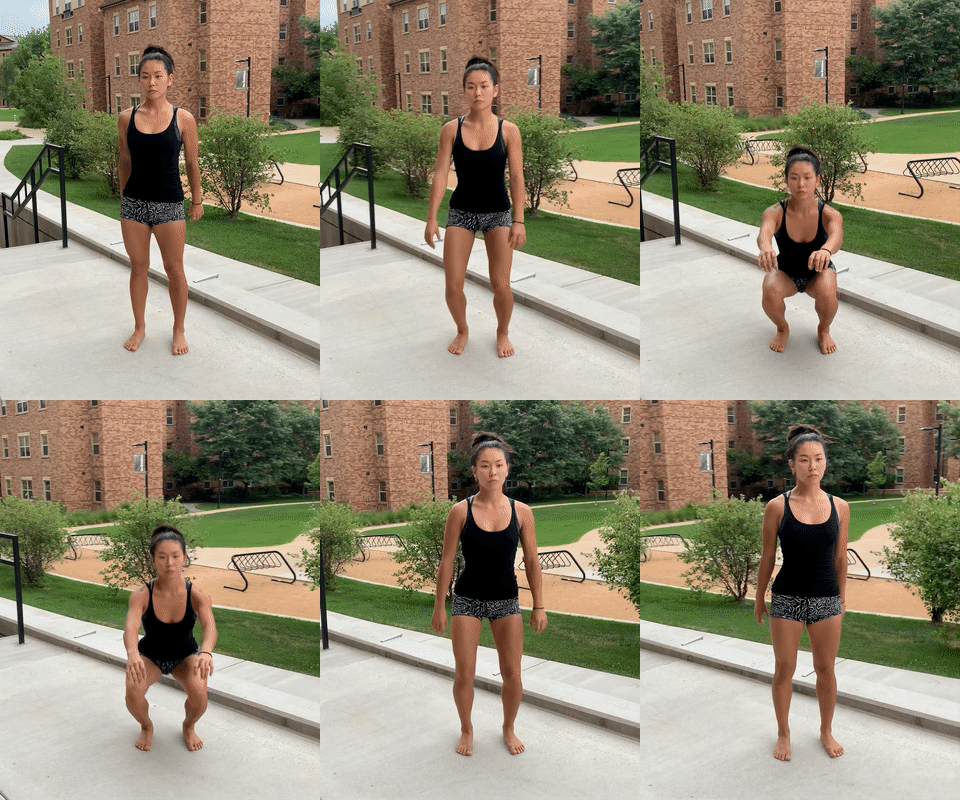
After that, you must practice absorbing the landing from a standing vertical jump. Swing your arms overhead as you jump to help float off the ground, but then land and lower back down as gently as a cat. Don’t bottom out, like a car sinking into a pothole. Ease into a gentle squat before standing up, resetting, and repeating the movement.
More advanced athletes can make the jump more challenging by adding a tuck at the apex of your leap. Lift your knees as high as you can, creating greater clearance from the ground.
Again, before moving on, show yourself that you can tuck jump and land with good form. If the movement is loud or painful, back off to an easier progression before moving on to more challenging skills. The next drill involves greater impact, and you really need to be prepared for it.
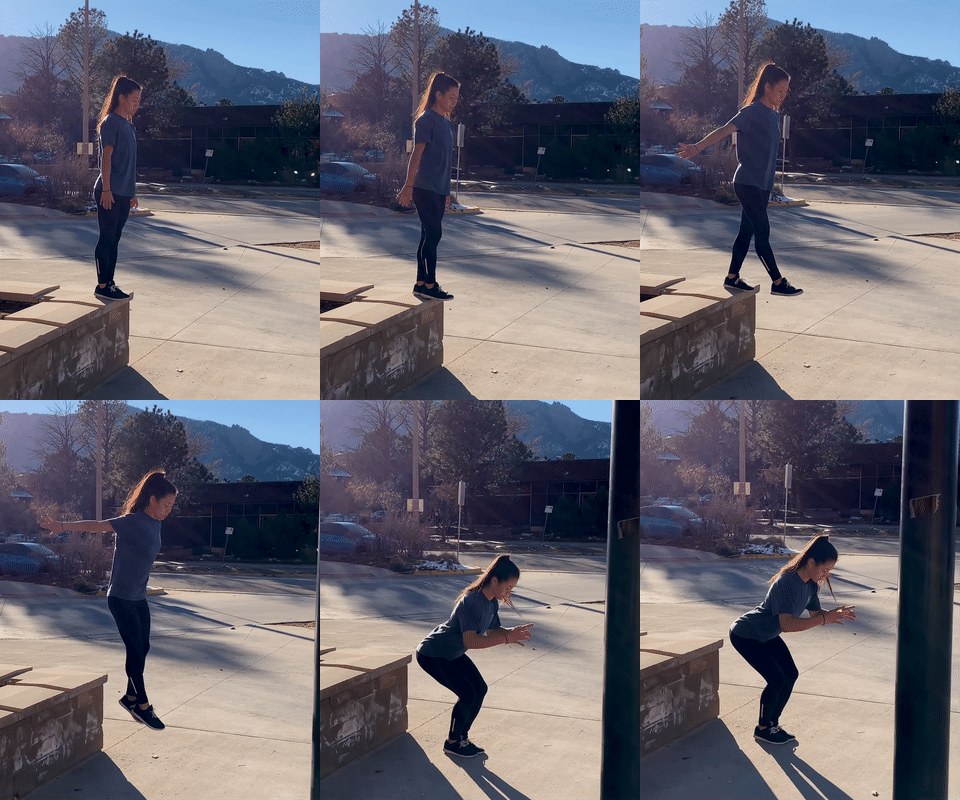
If you feel ready for it, what you are going to do next is take a step off a low obstacle, like a curb or park bench, and land strong on 2 feet. The motion is known as a depth drop, and it is 1 of 3 basic skills that you should understand at the end of this blog.
Time for a disclaimer: Dropping repetitively from any height may not be a nice thing to do to your joints. Especially as you do it higher and higher off the ground. Depth drops are no exception. You should be comfortable with this movement as a life skill, but it need not be something you train for many repetitions on a daily basis. Moderation is key.
Start with a really low obstacle. Try it off a curb. Lead with one leg as you step and drop off. Land on both feet, absorb your impact gently and quietly, and stand up. Assuming you have no pain or other difficulty, progress to trying it off a park bench.
Notice that you aren’t supposed to jump off the bench. Just take a small step and drop off. Be active through your feet, ankles, and knees, preparing yourself for impact.
Another crucial cue is that you need to be aware of your knee alignment. Don’t let them collapse inward or shoot excessively forward past your toes! Try to keep your knees stacked relatively right above your toes.
Athletes with good prior conditioning, may try depth drops from taller heights, but unless you have been training this for many months, don’t try it above knee-height yet.
Without going into a long explanation, know that depending on the circumstances of a drop, you may want to stay stiffer and taller in order to rebound quickly (hard) or you may want to absorb fully and silently (soft).
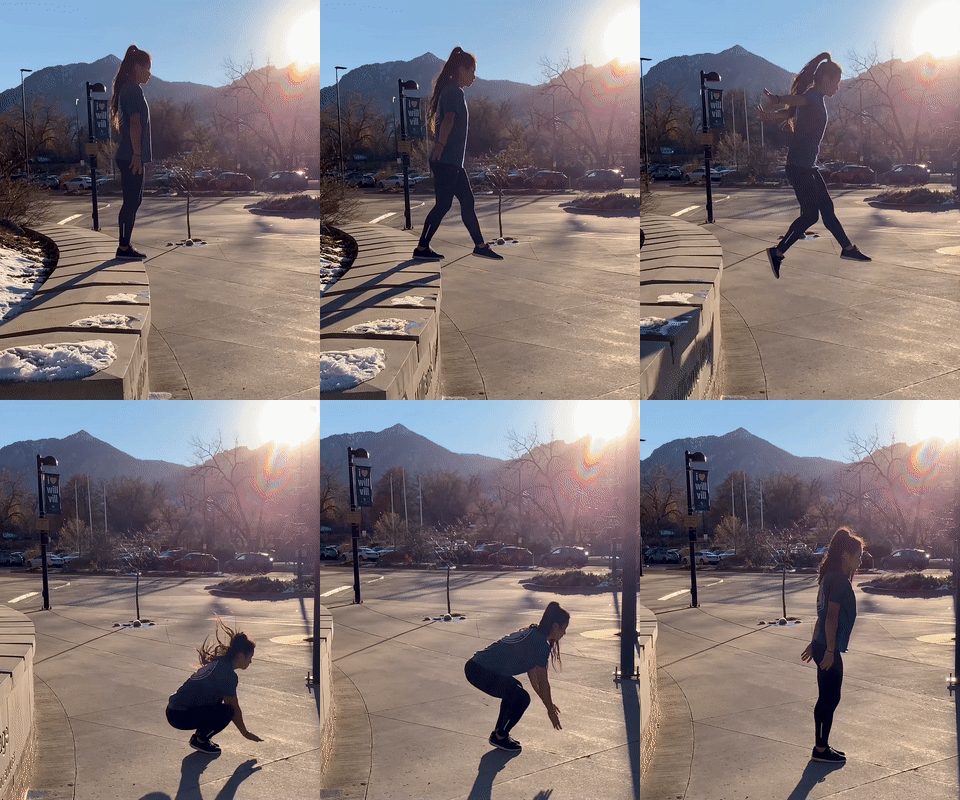
The higher the drop, the greater the need for full compression with your knees flexed beyond 90-degrees. Sometimes you will even need to put your hands down in front of you — between your legs, not outside — for extra support.
A good rule of thumb for beginners to follow is to try to limit your squat depth during a landing before you break a 90-degree angle with your upper and lower leg. Advanced athletes will likely have the strength, mobility, and control to safely absorb past 90 degrees, but beginners may not yet be ready.
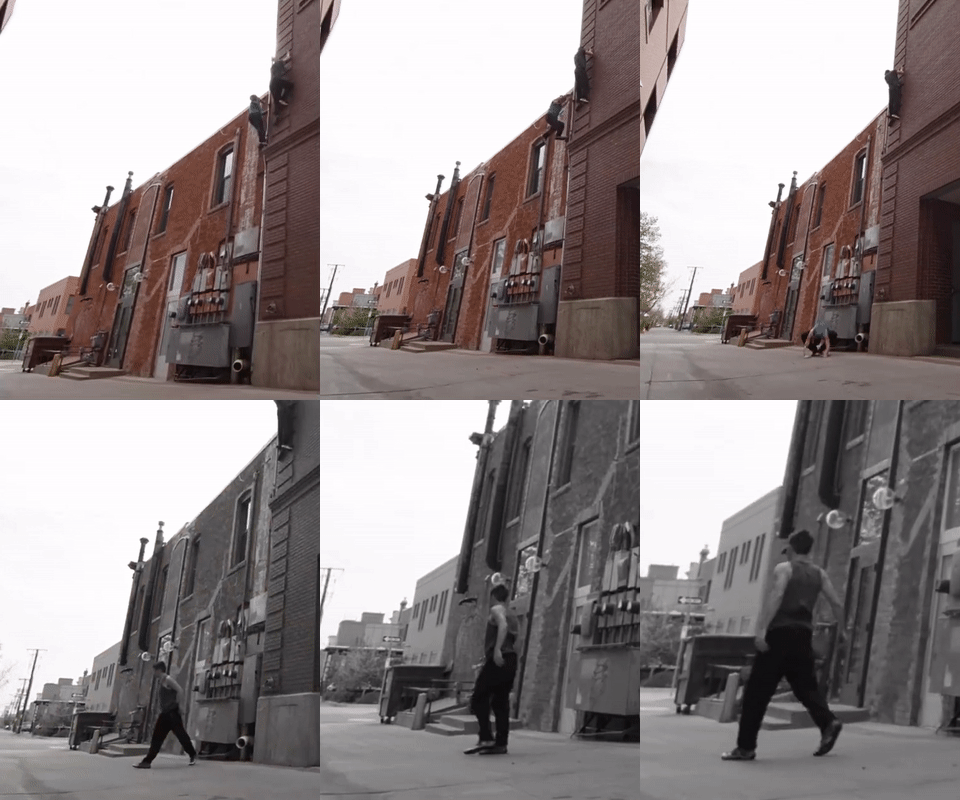
To see a beastly depth drop in real life, watch this video of former Apex athlete Dylan Baker taking a 2-story fall. The accidental drop comes at the 0:22 mark. Watch how low he compresses and how he uses his hands on the ground.
Before you go and try anything remotely similar, you should know that Dylan has been training parkour since 2007 and has exceptional levels of leg strength, mobility, and power. That fall would have killed many people. Because of his prior training, he was able to walk away unfazed.
Make it your goal to master a high-quality depth drop. Bad landings don’t always hurt you in the short run, but they will add up and destroy your joints over time. Whether you are jumping out of your truck, playing with your kids at the park, or enjoying a game of pick-up basketball, aim to have good landings in everything you do. The skill might even save your life one day.
→ For a skill-based approach to learning and teaching parkour, check out our #1 online training program: Parkour 100 Series
→ To get our most comprehensive parkour strength training resource, consider purchasing our digital training manual: Parkour Strength Online
Getting up quickly ↑
Moving on, let’s talk about 2 exercises that are crucial to helping you get above an obstacle with confidence.
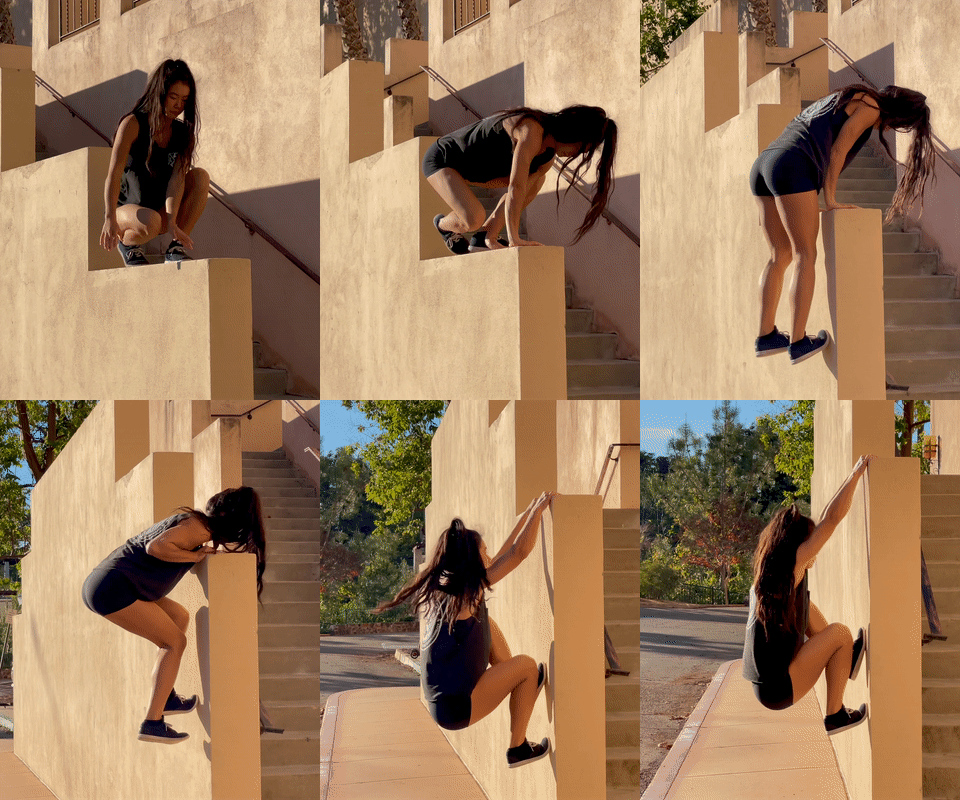
The cat hang comes first, and it should be thought of as a spring-loaded rest position below the lip of a wall. Whenever you climb a vertical obstacle, you would likely find yourself in this position right before trying to “mantle” up and over the top.
Scaling over the lip of anything is often the crux of the climb, so in that sense, the cat hang is the key building block that sets you up to finish the ascent of an overhead structure.
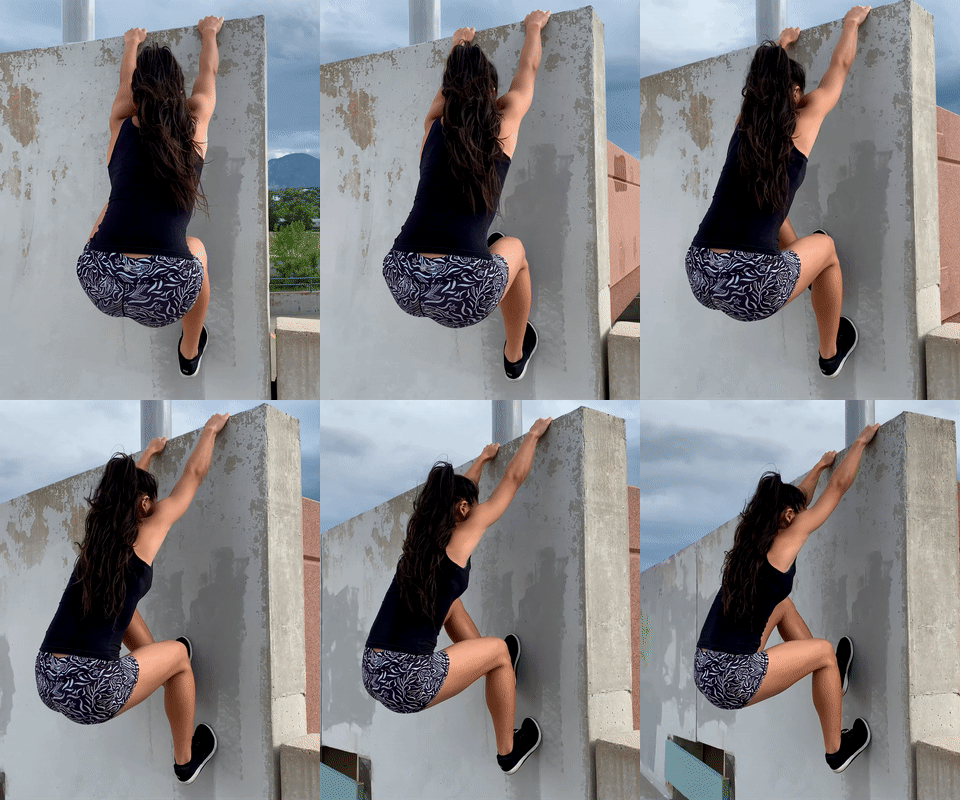
To perform it, grasp the top of a head-height wall and press your feet into the vertical surface, with your butt at the same level as you ankles. You arms should be extended and your lower body should be compressed into a tight ball.
The downward pressure from your fingers combined with the inward pressure of your feet against the wall provides the friction to keep you in place.
See how long you can hold the position. 5 seconds? 10 seconds? Test yourself. Ideally, you can hold this position for at least 20-30 seconds.
Once the cat hang is mastered, you can then pull yourself toward the top of an obstacle, in a cat hang pull-up, and eventually progress to a more advanced skill known as a climb-up.
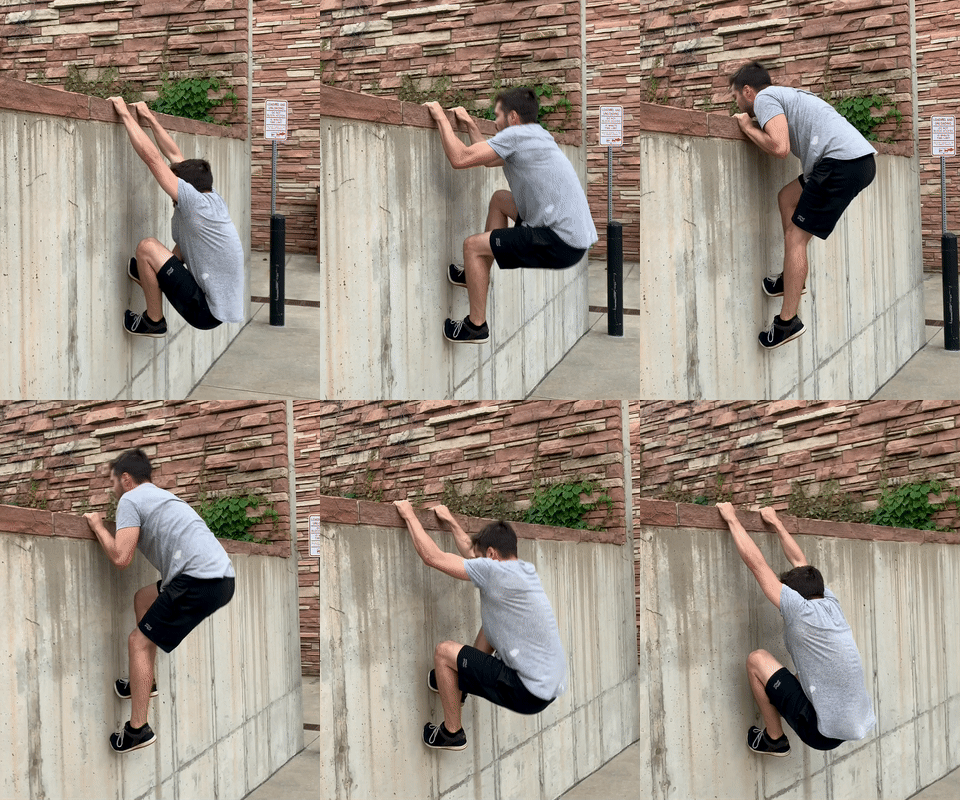
However before that, here are a couple of pointers:
One, your hands should be stacked directly over your shoulders. Use too wide or too narrow of a grip and you will have difficulty transitioning above the obstacle. Also, be sure to get as much of your fingers over the edge as possible. Hanging on by the tips of your fingers will make things more difficult.
Two, your feet need to really press into the wall along a horizontal line of force. If you’re pressing downward against the wall, you will slip. People who struggle with a full squat might have a hard time compressing their bodies tight enough to hold the right amount of tension. Go back and work on your lower body mobility.
As you become comfortable with the basic elements, begin to split your feet apart so that one sits a little higher than the other. This split-foot position provides a better platform to step into the wall once you begin training the climb-up.
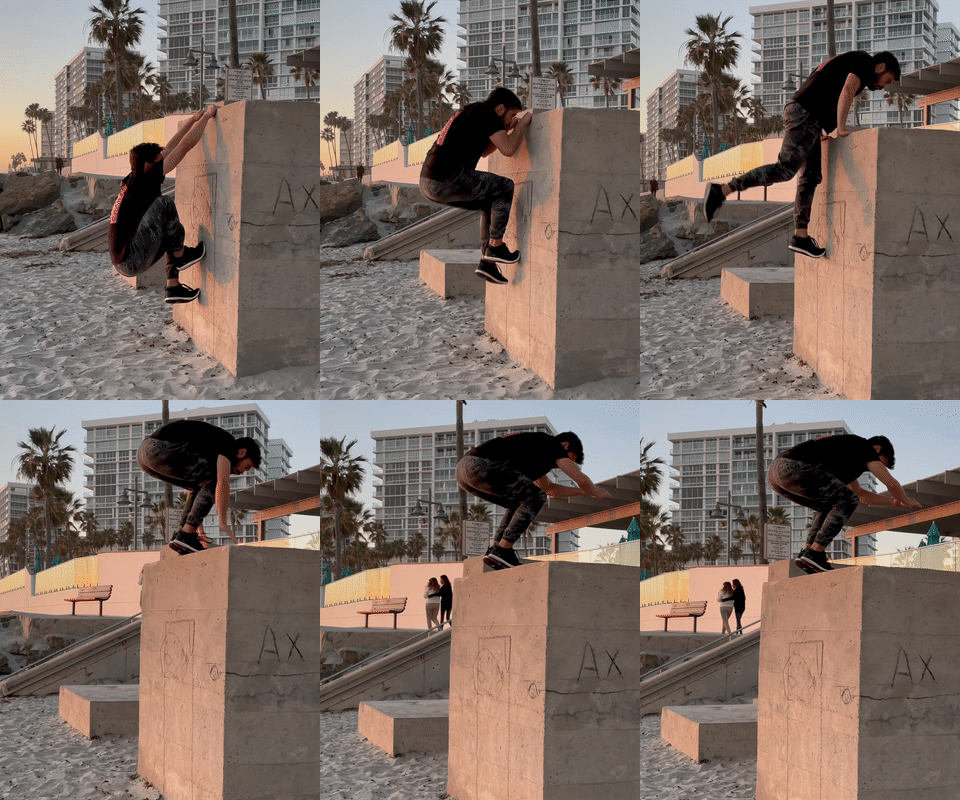
The next key skill for getting above an obstacle is known as wall support. Without a good command of this position, it is impossible to progress to more challenging exercises like a wall dip or the top-out.
To practice the wall support, find a wall that’s at least waist-high. Place your palms flat on the top of the obstacle and hop upward so your torso is positioned above your hands. Your hands should be spread shoulder-width apart and your fingers should be pointing straight ahead, rather than rotated outward. Wrist tightness can be a limiting factor here, so be sure to show some warm-up and prehab love to your wrists.
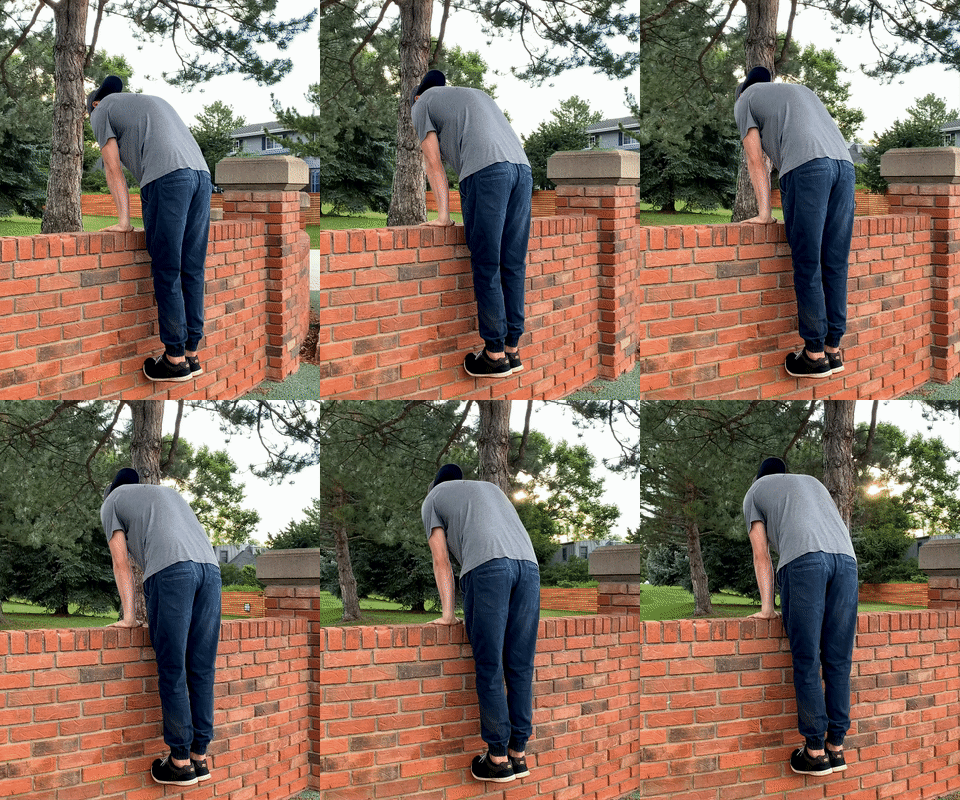
Now, lock your arms in extension and push the obstacle beneath you, staying active across your shoulder girdle. Don’t sag through your waist. You should be flexed at your hips, sticking your butt out a little. Think of how it feels to hold the hollow-body position of a good plank or the top of a push-up. The wall support is like that but applied to the top of an obstacle with the rest of your body beneath you.
What should your feet be doing? Flex your ankles so that your toes are pressed into vertical surface. Keeping your feet flexed like this is a good idea to avoid slamming your shins, plus it will help you kick off the obstacle for other movements.
Again, see how long you can hold your wall support. Ideally, shoot for at least 20-30 seconds of good form, with your arms straight and your body slightly piked.
Assuming you can do that without difficulty, play with shifting your weight from one arm to the other. Likewise, see how it feels to lift your torso up and down between your shoulders via a scapular dip. The wall support is a gateway skill to a huge selection of other movements, so be sure to perfect it.
By the way, although the cat hang and wall support have been presented as important to help you get above an obstacle, it should be mentioned that they are valuable for descending too. If you had to lower off the edge of an overhead surface you would likely first support yourself on your arms, and then sink into a cat hang before dropping to the ground below.
So, there you have it. Parkour isn’t that scary after all, is it?
Start with a couple of stripped-down basics, and build your skillset from there. We encourage you to explore the other ways that this discipline can help you explore your physical environment. Besides being a fun and challenging pastime, remember that parkour is also full of important life skills that you may have to use one day.
Video recap
Related posts
Too old, too fat, too weak for parkour? Start with these 5 basic movements
“When did you start parkour?” “When did you stop?” … 🤔 Everyone did at least a bit of parkour as a kid. At one point
Intro to climb-up strength & skill training
When was the last time you stumbled across a set of rings or monkey bars outside the gym? Maybe at a park or playground? What
Six foot drills for ankle mobility, strength, & stability
When I first stumbled upon The Foot Drills by Russ Ebbets, DC, I was impressed by the elegance of the idea. Six foot drills can
Build your climb-up from the ground up
If your climb-up needs work, consider drilling the progressions in this blog post. For most of these movements, remember to put extra emphasis on training

